If you’re like most people, when it comes time to maintain your lawn mower, the first thing that comes to mind is the blade.
But what about the carburetor? Where is the carburetor on a lawn mower and what does it do?
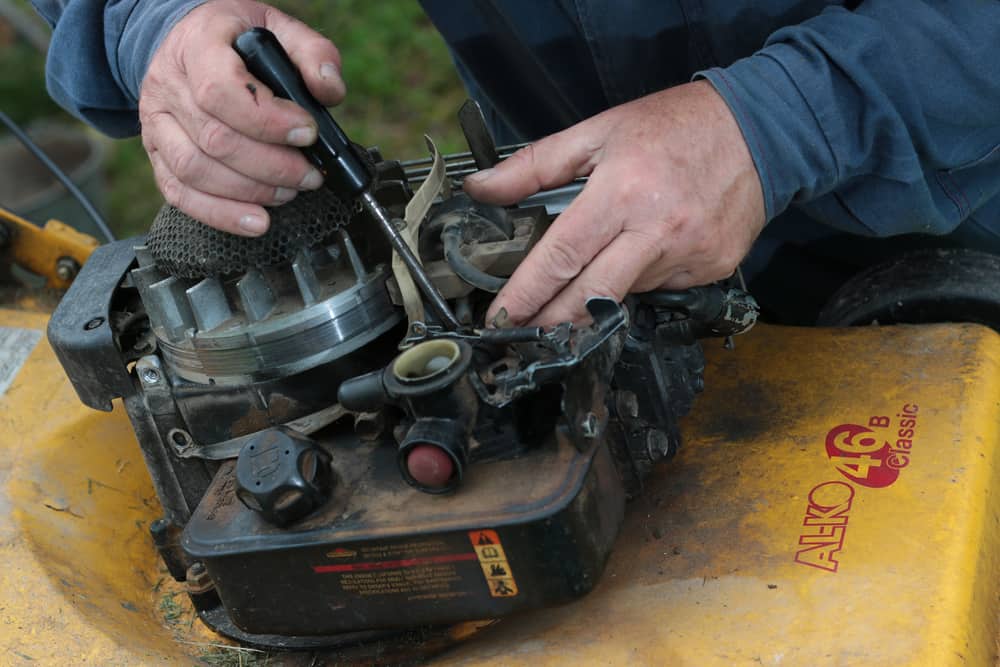
In this post, we’ll answer those questions and show you how to keep your carburetor in good shape.
Where Is The Carburetor On A Lawn Mower?
A lawnmower carburetor is normally bolted at the top or side of the mower engine, attached to a fuel line, and covered by an air cleaner. Most lawnmower carburetors are front-mounted so that it sucks in enough fresh air as it moves forward
See: why riding mower won’t move forward or reverse
It is important that you understand your lawn mower to have it serve you right for as many years as possible. Knowing your mower will help you clean it and perform simple maintenance tasks.
Brands of Lawn Mowers and Location of Their Carburetors
Briggs and Stratton Carburetor
This model is characterized by its plastic body and metal gas tank assembly. The Briggs and Stratton carburetor exists under the air filter and deploys springs and levers to control engine rpm.
Craftsman Riding Lawn Mower
This lawnmower has its carburetor under the air filter housing on the front-right side of the lawn mower’s engine.
Husqvarna Lawn Mower
Husqvarna lawn mower’s carburetor is attached beside the engine’s housing beneath the hood, and it has choke levers that regulate the engine rpm. It incorporates a metal casing, inlets, and outlets.
See: Are Husqvarna mowers good?
John Deere Lawn Mower
The John Deere lawnmower lies on the mid-right side beneath the engine hood. It integrates a distinctive black bowl with a tiny needle valve underneath.
Please keep reading as we unfold more details and the basics of a lawn mower carburetor.
Read: Kawasaki fr691v carburetor problems
How Do You Clean a Carburetor On a Lawn Mower Without Removing It?
Cleaning a lawn mower carburetor is a good monthly practice in preserving it to prolong its lifespan.
You do this because a lawn mower carburetor can clog due to dirt build-up, gasoline deposits, oil deposits, and varnishes.
These impurities block the carburetor’s inlet and outlet ports, causing your lawn mower engine to misbehave regardless of how powerful it is.
However, don’t worry If this occurs, you can clean your carburetor to resume duties without uninstalling it.
Supplies Needed
- Safety goggles or glasses: Protect your eyes from potential debris or chemicals.
- Work gloves: Keep your hands safe from sharp edges or harmful chemicals.
- Screwdriver: Used to loosen or remove screws that hold the carburetor cover in place.
- Carburetor cleaner: Look for a spray specifically designed for carburetors. Avoid using general-purpose cleaners, as they may damage the carburetor components.
- Compressed air can or air compressor: Use compressed air to blow away debris and dry the carburetor after cleaning.
- Small brush or toothbrush: Ideal for scrubbing and removing dirt, grime, and deposits from the carburetor components.
- Shop towels or rags: Use these to wipe away excess cleaner and to clean any spilled fuel.
- Fuel stabilizer: Optional but recommended if you plan to store the lawn mower for an extended period. It helps prevent fuel from deteriorating and clogging the carburetor.
- Fuel siphon or gas can: If needed, use a fuel siphon to safely remove fuel from the lawn mower’s tank before starting the cleaning process. Alternatively, you can use a gas can to drain the fuel.
- Plastic sheet or newspaper: Lay down a protective barrier on your working surface to catch any spills or prevent stains.
- Ventilation: Ensure good ventilation in the area where you’ll clean the carburetor to avoid inhaling fumes.
Step-by-step Process
Step 1: Do an Initial Checkup
First, assess your carburetor to watch out for any irregularities. Check the air and fuel filters to ensure they are dirt-free because a clogged air filter elicits black smoke that spills from your exhaust.
Also, ensure all connections are intact to avoid constant vibrations, which can loosen screws with time, resulting in strange handling and carb issues.
Step 2: Expose the Carburetor by Uninstalling the Outer Components
This step involves disassembling the neighboring components to expose the carburetor.
- Remove the Mower Air Filter
The air filter lies at the exterior of the mower adjacent to the fuel tank. You will need a screwdriver to disjoin the screws securing it in place.
Once the mower air filter comes off, soak it in soapy water and rinse it thoroughly to remove the blockages.
- Remove the Fuel Lines
Now that your carburetor is exposed, you should detach the fuel lines on the carburetor using nose pliers.
Be sure to position a plastic container under the fuel line so that fuel drains into it instead of spilling down.
- Unscrew the Jets
Next, use a wrench to unfasten the jet and bolt underneath your carburetor bowl. Once you’re through, slowly remove the gaskets and ensure they are in good condition.
After that, take a thin metal wire and pass it through the jet to clean it. You can also use sandpaper to scrape off flakes on the nut’s side.
Step 3: Use the Aerosol Spray to Clean the Inner Parts of the Carburetor
The next step is to use a good-quality aerosol spray cleaner for carburetors to remove all dirt. Begin by placing the spray tip into the center of the carburetor and start spraying all over the surface.
Please remember to run the lawn mower engine so the spray penetrates all crevices of the carburetor leaving behind no clogging. However, avoid touching the carburetor when the mower engine is running.
Step 4: Reassemble the Parts
After cleaning, you can reinstall the carburetor components to their exact position; Begin by securing the jets and replacing the gaskets where necessary.
Then use a screwdriver to fasten the conventional gas bowl tightly and clean it from the outside using a clean rag. Attach the fuel lines to the carburetor. Use laps to secure the fuel line.
Finish by reinstalling the air filter and the fuel tank to their initial position and screwing them tightly.
Once you’re through, add fresh fuel and ignite the lawn mower engine to ascertain if the mower is running as expected.
Why Should You Avoid Removing the Carburetor to Clean It?
It’s not advisable to disassemble the carburetor to clean it because it requires mechanical experience.
Ideally, uninstalling the carburetor yourself can ruin it completely; therefore, it’s not worth trying it.
Tip
If you decide to remove the carburetor to clean it, ensure you take a photo before detaching any parts.
Doing this ensures you won’t have a rough time reinstalling the hardware in its exact position.
How Do I Know If My Lawn Tractor Carburetor Is Bad?
It’s easy to tell that your ridding mower has issues by examining the following aspects:
Poor performance
You’ll know that your lawn mower carburetor is bad when the performance declines significantly.
For instance, your ridding mower won’t be able to trim huge patches of grass smoothly as before. If you let this issue persist for a while, your mower’s engine may fail, adding to the cost.
Black smoke
The production of black smoke implies that your carburetor needs to be cleaned because the lawn mower engine is taking up fuel without control. This issue causes more problems in your mowing experience.
One is that you will spend more gasoline for your lawnmower, which isn’t good for your mowing efficiency.
Secondly, the black smoke will cause the lawn mower engine to deteriorate gradually. So it’s best to avoid these issues by cleaning the carburetor frequently.
Overheating Issues
If your lawn mower engine overheats, the carburetor is likely the cause. That’s because the carburetor might have blockages resulting in a faulty ratio mix of air and fuel.
As such, the lawn mower engine exerts more force trying to work hard than it should, resulting in overheating.
Sudden power cut
A lawnmower can easily run for more than two hours with ease. However, if yours shuts down suddenly before the expected duration, your carburetor has issues.
Therefore, you need to assess it and thoroughly clean it for your mower to function as expected. Also, check the fuel line to make sure it’s not clogged.
Trouble starting or jump-starts
It’s easy to notice a bad carburetor by assessing the start-up. When your lawn mower encounters a shaky start, the carburetor is likely clogged.
Fortunately, you can easily fix this by removing all metal components surrounding the carburetor and cleaning it with an aerosol cleaner.
What Are the Symptoms of a Bad Carburetor?
A carburetor fulfills various important functions. First, It creates combustion by combining air and gasoline to power the engine.
Secondly, it regulates that mixture to optimize the engine’s performance. And lastly, it regulates the lawn mower engine speed.
Despite these benefits, the itching question that most users ask is, what are the symptoms of a bad carburetor?
The symptoms of a bad carburetor are:
- Engine over speeds.
- The engine begs for fuel at high speed.
- Carburetor floods.
- Excessive idle speed.
- The engine fails to accelerate.
- Carburetor is out of adjustment.
- Engine hunts at high speed.
- Carburetor leaks.
How Do You Tell If You Need to Replace a Carburetor?
Most carburetor problems are attributed to dirt build-up, flooding, etc. Since these signs can seriously harm your engine, you must be well-versed with the symptoms that suggest you need a new carburetor.
So how do you tell if you need to replace your carburetor? You can tell your carburetor needs replacement if you discover popping through the exhaust or backfiring.
Another indication is the engine running rough, stalls, leaks, or smells like raw fuel.
Tip
If your carburetor is damaged beyond repair, consider replacing it to avoid attracting costly repair charges. Replacing the carburetor will keep the engine running reliably.
Read: Kawasaki fx730v carburetor problems
How to Tell If Your Carburetor Is Working Properly
A stubborn carburetor can cultivate various problems, including excessive fuel consumption, hard starting, rough idle, and more.
These issues often require a more-accurate diagnosis using quality tools to fix them. However, you can diagnose them using these quick tests at home.
Float level adjustment
Before performing this test, ensure the engine is slightly warmed up. Then disassemble the air cleaner and carefully look down the carburetor’s throat at the main nozzle.
If it seems wet or seeping gasoline, the float level has exceeded the specific range. This can prompt the fuel to discharge from the nozzle when the engine is idle.
Idle System
If your engine idles shortly after warming up, the idle system could be faulty. So you will want to loosen the throttle slowly until the engine runs at around 3,000 pm.
If the speed doesn’t intensify evenly and the engine runs roughly, the idle system is defective and needs a quick fix.
Accelerator pump system
You must disconnect the air cleaner, shut off the engine, and assess the carburetor’s throat in this step.
After that, open the throttle quickly. You should see the accelerator pump system release a jet of fuel into each primary barrel.
The flow should proceed after the throttle valve extends to the full-throttle position.
How Much Does It Cost to Fix a Carburetor?
The cost of fixing a carburetor varies based on how complex the repair is, how long the repair service takes, and whether new parts are required.
Usually, a carburetor service man charges around $50 for carburetor repair. But as spoken of earlier, the price can increase depending on the severity of the damage.
How Much Is a Carburetor For a Lawn Mower?
A standard lawn mower carburetor costs around $30. However, the price varies depending on the lawnmower model.
What are the Three Types of a Carburetor?
Carburetors exist in three types depending on the direction in which the mixture is disbursed.
Up-draft carburetor
This option supplies air from the bottom of the mixing chamber, and fuel comes from the float chamber.
Horizontal type carburetor
The horizontal-type carburetor supplies air from one of its sides to mix with fuel for combustion.
Down-draft type carburetor
Lastly, this option supplies air from the top portion of the mixing chamber.
Mostly, the down-draft type carburetor is favored by most users because of the following benefits:
- The gravity enhances the flow of the mixture, so the engine jerks better at lower speeds under load.
- This carburetor type facilitates the engine to attain a higher value of volumetric efficiency.
- The carburetor position is easily accessible for basic maintenance and more.
The only downside is the high chance of leakage going directly into the inlet manifold if the float is faulty and the jet overflows.
Why Is My Lawn Mower Only Running On Choke?
If your lawnmower only runs on a choke, you may have a blockage in the carburetor or too lean fuel mixture. You need to investigate and ascertain why this is the case.
If your fuel mixture is too lean, don’t worry, as you can richen it up by adjusting the idle or fuel screw on your carburetor.
But if your carburetor has a blockage, uninstall its neighboring components and clean its inner side and fuel valve.
Why Does My Lawn Mower Run For a Few Seconds Then Die?
There are many reasons your lawn mower runs for a few seconds and then dies. It could be a spark plug failure, a clogged air filter housing, lack of gas flow to the engine, and lastly, a dirty carburetor.
Here are a few carburetor problems that can cause your lawn mower to power off after running for a few seconds.
Loose Carburetor
A lawnmower carburetor integrates many screws, so each of these screws should be intact for the engine to work as expected.
If these screws are not tightened, the carburetor will run loosely, causing an air leak. This way, the engine will receive insufficient fuel and airflow, causing it to die immediately after igniting.
Clogged Carburetor
Another reason your lawn mower starts and then dies is the blockage of the carburetor’s internal parts. This happens due to the gunk build-up from old stale gasoline in the carburetor bowl.
A quick fix to this issue is to unscrew the bowl underneath the carb and inspect for any trapped dirt.
If you discover gunk inside, scrape it out, then spray the inner components of your carburetor with a certified carburetor cleaner. After that, reattach the bowl and restart the engine to test it.
Other issues attributed to a lawnmower that starts and dies include:
Faulty or dirty spark plug
The essence of a spark plug is to produce sparks that complete air mixture combustion. However, this device gets dirty because of oil deposits affecting the spark plug tube seal.
If this occurs, the dirt penetrates the spark plug’s seat and contaminates the electrodes in the combustion chamber, causing the engine to die.
The best way to fix dirty or faulty Spark Plugs is to clean them after detaching them from the wire cap.
Use a plug socket to unscrew the plug and be cautious not to damage the porcelain neck. Then clean the plug seat to remove all carbon and oil deposits.
Tip
Please remember to use sandpaper or a small nail to clean the gap between the side and center electrodes, then spray it with a carb cleaner.
If you don’t have sandpaper, you can still use a wire brush and attain the same objective.
Blocked Fuel Cap
Are you aware that the cap of your lawn mower’s gas tank can cause your mower engine to start and die? Most riding lawn mowers have gasoline caps with holes to stabilize the pressure in the gas tank.
When these holes are packed with dirt, the pressure develops a vacuum that suspends the flow of gasoline to the carburetor. As such, the lawn mower will start but die after a few seconds.
Luckily, you can fix this issue by cleaning the hole with a thin wire or replacing it if it’s beyond repair.
Clogged Air Filter Housing
A clogged or defective air filter housing disrupts sufficient air intake to the engine. The air-to-fuel ratio is restricted, causing sputters or stalling the engine soon after ignition.
So to prevent this from transpiring, always clean your air filter using water and a cleaning detergent.
If your mower deploys the paper filter, clean it using compressed air and reinstall them to their exact position.
How Do You Change a Carburetor on a Lawn Mower
A lawnmower carburetor needs periodic maintenance to keep the mower running like new. But what if the existing carburetor surpasses its better days?
The only solution is a complete replacement. This article highlights the basics of changing your outmoded carburetor and replacing it with a new one. Read on to learn more.
Step 1
Before you begin, turn off the mower, so the engine cools. Then position your mower in a well-ventilated workspace.
Wear rubber gloves and goggles to avoid unexpected injuries to your hands and eyes.
Step 2
Once you’re set, Locate the carburetor, detach the spark plug wire from the spark plug and release the catch to drag the air filter cover off. Doing this exposes the air filter so you can remove it easily.
Use a screwdriver to unfasten the screws on the air filter base. Then release the breather tube and pull out the air filter base.
Step 3
Place a clean rag below the gas tank to capture any spills. Next, position a fuel-safe container under the gas line connection to your fuel gas.
This ensures that the gasoline won’t spill throughout your workspace. Release the spring clamp while disengaging the fuel line from the gas tank.
After that, let the gasoline drain into the container you placed below the gas line connection. Take a soft cloth and clean any spills before proceeding.
Step 4
After completely draining the gasoline into the container, release the starter rope from your lawnmower handle.
You then use a screwdriver to unfasten the screws from the blower housing and slowly pull the blower housing off your engine.
Set it aside for now and take a photo before proceeding to help you recall the exact position of each component.
Step 5
Now that the carburetor is exposed, detach the bracket arms to release the carburetor and separate it from the carburetor adapter.
Hold the carburetor above the bracket, disengage the choke linkage rods and the governor and pull out the carburetor.
Step 6
Next, discharge the fuel line spring clamp and disconnect the fuel line from the carburetor. This exposes the O-ring.
You will need to push it into the outlet port of the new carburetor and mount the retainer on top of the O-ring, so it fits In firmly. If not, your carburetor will have issues forming a combustible solution.
Next, connect the fuel line to your new carburetor and secure it with the spring clamp.
After that, hold your carburetor some inches above the mounting brackets to attach the choke linkage rods and governor effortlessly.
Now drag the carburetor into the bracket arms and push the outlet port onto the carburetor adapter.
Ensure the port fits in firmly before positioning the air cleaner gasket into the channel on the carburetor inlet port.
Step 7
This step involves mounting the blower housing. Carefully take your blower housing and place it directly on top of the engine.
You can refer to the previous photos to ascertain the exact position of each component.
Align the mounting holes with the blower housing and reinstall the screws firmly to avoid introducing vibrations while mowing. After that, reattach the starter rope to the mower handle.
Step 8
Attach the fuel line to the gas tank fitting and secure it using a spring clamp to prevent it from coming off mistakenly.
Step 9
Check if the fuel line is plugged in correctly before proceeding. Take your air filter and position the base directly before the carburetor to reconnect the breather tube.
Locate the mounting screws and use them to secure the air filter base. Then place the air filter cover in front of the base and engage the locking tab.
Once you’re through, push the spark plug wire into the spark plug and test your mower. Remember to fix back the air filter.
How Do You Fix a Lawn Mower That Starts Then Dies?
Riding mowers that start and then die is a common problem most gasoline-based mower users face.
But if this happens, don’t rush to contact your serviceman, as there are some easy troubleshooting tips you can employ to fix it cheaply.
Supplies needed
- A carburetor cleaner
- A small thin wire
- A rag
- Safety glasses
- Locking Pliers
- ½ Inch socket wrench or a spanner
- Gloves
Step 1
First, pinch off the fuel line using locking pliers, then locate the bowl by following the edge below the carburetor.
Once you find the bowl, place a rake below it and uninstall it. You don’t have to remove the air intake because a soft gasket behind it triggers the primer.
If you damage it, your priming won’t work, and starting the mower will be more difficult than before.
Step 2
Disconnect the spark plug on the front, locate the main jet to your carburetor, and unfasten the nut that secures it. Some fuel will drip out, so be prepared with a rag to wipe out the spills.
Take the main jet and the gasket from the bottom of the carburetor bowl and scrape off any dirt using a thin wire.
After that, wear your safety glasses and spray the jet with a carburetor cleaner. Doing this removes any dirt build-up in the jet.
Step 3
Reinstall the bowl and the jet back to their initial positions and reconnect the spark plug. Before testing, if the engine is working, remove the clamps to check for fuel leaks.
Conclusion
As stated in this guide, a carburetor has a big impact on a lawn mower’s overall performance. It mixes air and fuel appropriately to form a combustible solution to ignite the engine.
Besides, it also fulfills other functions like controlling the engine speed, regulating the air-fuel ratio, and more.
Locating a carburetor on your lawnmower is difficult because of the compactness of some models. Therefore calling into question…