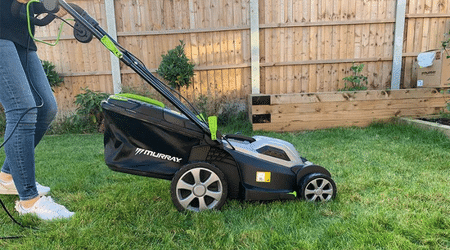
Tired of the familiar scenario where your trusty Murray lawn mower won’t start when you need it most? You’re not alone. I have also been there.
So, in this blog post, I’ll unravel the mystery behind those frustrating moments when your Murray lawn mower won’t kick into action.
From fuel tank dilemmas to spark plug mysteries, I’ll explore 19 common reasons why your mower might be giving you the cold shoulder.
So, grab your toolbox, and let’s dive into the world of troubleshooting, as I help you resurrect your green companion.
19 Reasons Why Your Murray Lawn Mower Won’t Start
Let’s explore the 19 common culprits behind your Murray mower’s refusal to spring to life.
From empty fuel tanks to spark plug mysteries, I’ve got you covered with causes, solutions, and prevention tips to get your mower running smoothly again.
So, let’s dive into the troubleshooting journey and reclaim that perfectly manicured lawn.
1. Empty fuel tank
The most obvious reason your Murray lawn mower won’t start is an empty fuel tank. Without a sip of gasoline, your mower is as silent as a library during naptime.
What is the solution?
Refill the fuel tank. The solution here is straightforward. Fill the gas tank with fresh, clean gasoline.
Ensure you use the right type of fuel as specified in your mower’s manual. This is most likely to be unleaded gasoline.
Prevention tips
Regularly check fuel levels. Make it a habit to check the fuel level in your mower’s tank before each mowing session. This simple step can help you avoid running out of fuel unexpectedly.
Use fresh fuel. Avoid using old or stale gasoline, as it can cause starting problems. Consider using a fuel stabilizer if your mower is not in use for extended periods.
Store fuel properly. If you have extra fuel, store it in a clean, airtight container away from direct sunlight and moisture. This helps maintain the fuel’s quality.
Follow recommended fuel guidelines. Always follow the manufacturer’s recommendations for the type of fuel and oil mixture if applicable.
2. Old or bad fuel
If your lawn mower is playing hard to get or refusing to start, the culprit this time could be old or bad fuel. Like a spoiled batch of cookies, stale fuel can leave your mower in the dust.
Causes
Aging fuel. Over time, gasoline can break down, losing its potency and becoming less combustible. This is especially true if you’ve left fuel sitting in your mower’s tank for an extended period.
Water contamination. Moisture can find its way into your fuel tank, either through condensation or improper storage. This water can lead to fuel contamination and starting issues.
Solutions and advice
Here’s what to do once your fuel has gone stale:
Empty the old fuel. If you suspect your fuel is old or bad, drain the tank completely. Dispose of the old fuel properly at a recycling center or hazardous waste facility.
Refill with fresh fuel. Replace the old fuel with fresh, high-quality gasoline. Ensure it’s the right type and has the recommended octane rating.
How to prevent this
To prevent your gasoline from going bad:
Use fuel stabilizers. If you anticipate storing your mower for an extended period, consider adding a fuel stabilizer to the gasoline. This helps slow down the breakdown of the fuel.
Keep the fuel tanks full. Whenever possible, store your mower with a full tank of fuel. This reduces the space for moisture to accumulate in the tank.
Regular maintenance: Follow a schedule for using and replacing your fuel. Try to use up stored fuel within 30 days and replace it with fresh fuel as needed.
3. Murray Mower Fuel Cap Problem
Let’s talk about something many of us have experienced. Problems with the gas cap on our Murray mowers.
It might seem like a small part, but when it goes wrong, it can leave you stuck.
Common causes
Ventilation issues. Fuel caps are designed to allow proper ventilation in your mower’s fuel tank. If the cap is damaged or clogged, it can disrupt the flow of air into the tank, causing fuel delivery problems.
Sealing problems. A fuel cap must create a secure seal to prevent fuel from evaporating and to maintain the correct fuel pressure. If it doesn’t seal properly, it can lead to fuel evaporation and starting difficulties.
How to fix this
Inspect the fuel cap. Begin by inspecting the fuel cap for any visible damage or signs of wear. Ensure that the cap is clean and free from debris.
Check ventilation. If your mower still won’t start, check the ventilation function of the fuel cap. You can do this by temporarily removing the cap and trying to start the mower. If it starts, the cap might have ventilation issues.
Replace the fuel cap. If you find damage or sealing problems, consider replacing the fuel cap with a new, compatible one from your mower’s manufacturer.
Proper fuel cap management
Regular maintenance. Include the fuel cap in your regular mower maintenance checklist. Clean it and inspect it for damage periodically.
Proper storage. When storing your mower for an extended period, make sure the fuel cap is well-tightened to prevent fuel evaporation and contamination.

4. Bad Spark Plug or Loose Connection
Another common reason why your trusty Murray lawn mower might refuse to start is a bad spark plug or a pesky loose connection.
These small but mighty components play a vital role in igniting the engine and keeping it running smoothly.
Most of the time, you will experience a loose spark due to:
- Worn-out spark plug
- Loose or disconnected spark plug wire
Fixes
Replacing the spark plug. If your spark plug is worn or fouled, replacing it with a new, properly gapped spark plug can often resolve the issue.
Checking and securing the spark plug wire. Ensure the spark plug wire is securely connected to the spark plug and ignition coil. If it’s damaged, consider replacing it.
Ways of prevention
Regular inspection. Make it a habit to inspect your spark plug and its wire for any signs of wear or damage during routine maintenance.
Scheduled replacement. Follow the manufacturer’s recommended spark plug replacement schedule.
5. Clogged Air Filter
A dirty filter may seem to be a minor component but plays a major role in your mower’s performance. When an air filter is clogged, it can hinder the engine’s ability to breathe.
The main cause of a clogged filter is dust and debris accumulation. Also, a clogged fuel filter causes a lawn mower not to move forward or reverse.
How to repair
Inspect the air filter. Begin by locating and removing the air filter. Inspect it for signs of clogs or excessive dirt buildup.
Clean or replace: If the filter is dirty but still in good condition, you can clean it using compressed air or by gently tapping it to remove debris. For severely clogged or damaged filters, replacement is the best option.
Prevention tips
Regular cleaning. Include air filter inspection and cleaning as part of your routine mower maintenance schedule. Cleaning it after every few uses can help prevent clogs.
Avoid mowing in dusty conditions. Mow when the grass and surrounding areas are not dry or dusty to reduce the chances of clogs.
Use quality filters. When replacing the air filter, opt for high-quality.
6. Bad Fuel Pump
A bad fuel pump can turn your lawn mowing plans into a frustrating ordeal. A fuel pump is responsible for delivering a steady flow of fuel to your mower’s engine.
When it malfunctions, your mower may refuse to start altogether.
Without the proper fuel delivery, the engine won’t receive the necessary fuel-air mixture. This will hinder combustion and leave you with a stubbornly silent mower.
Causes of a bad fuel pump
Wear and tear. Fuel pumps have a limited lifespan and can wear out over time, especially if you’ve used your mower extensively.
Contaminated fuel. Dirt, debris, or water in the fuel can damage the fuel pump, leading to reduced efficiency or failure.
Quick fix
Inspect and test. Start by inspecting the fuel pump for visible damage or signs of wear. You can also perform a fuel pressure test to determine if it’s delivering the correct amount of fuel to the engine.
Replace the fuel pump. If the fuel pump is indeed faulty, the most effective solution is to replace it with a new, compatible pump.
How to prevent
Use clean fuel. Always use clean, high-quality fuel in your mower to reduce the risk of fuel pump contamination.
Regular maintenance: Incorporate fuel pump inspection into your routine mower maintenance. Replace it as recommended by the manufacturer or if you notice any issues.
Proper storage. When storing your mower for an extended period, use a fuel stabilizer to prevent fuel-related issues.
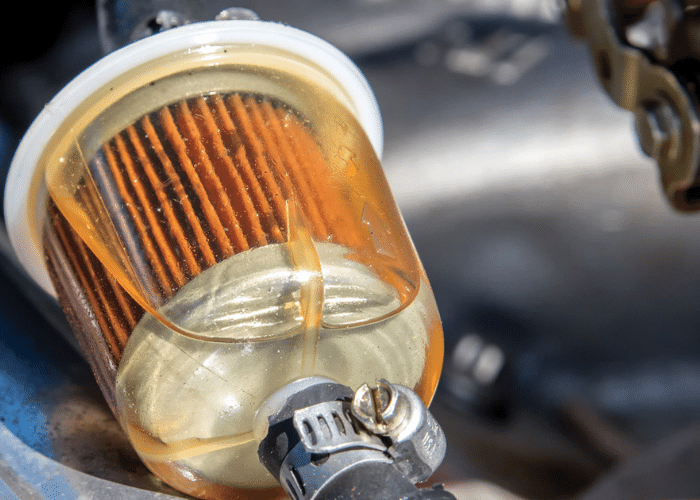
7. Plugged Fuel Filter
This seemingly small component plays a significant role in ensuring clean fuel reaches your engine. When it’s clogged, it restricts the flow of fuel.
This leads to poor or no combustion, which ultimately prevents your mower from starting.
The major cause of a plugged fuel filter is accumulated debris.
Solutions
Inspect the fuel filter. Begin by locating and inspecting the fuel filter. If it’s visibly dirty or clogged, it’s time for action.
Replace the fuel filter. For severely clogged or old filters, the best solution is to replace them with new ones.
Prevention tips
Regular inspection. As part of your mower’s routine maintenance, inspect the fuel filter periodically. Replace it as recommended by the manufacturer or if you notice any signs of clogging.
Clean fuel practices. Use clean, high-quality fuel in your mower.
8. Blockage in the Fuel Line
A blocked fuel line can turn your lawn mower’s starting process into a nightmare. It hinders the flow of fuel from the tank to the engine.
The engine is starved of the necessary fuel-air mixture for combustion.
Without this mixture, your mower won’t start or will struggle to run efficiently.
Causes of blocked fuel lines
Fuel contaminants. Dirt, rust, and debris can enter the fuel tank over time, leading to a buildup in the fuel line.
Stale fuel. Old or stale gasoline can form varnish deposits in the fuel line, causing blockages.
Water in fuel. Moisture can accumulate in the fuel tank, leading to the formation of water droplets that can block the fuel line.
Fuel additives. Certain fuel additives, if not used correctly or in excess, can create deposits that clog the fuel line.
Kinked or damaged fuel line. Physical damage to the fuel line, such as kinks or cuts, can restrict fuel flow.
Prevention tips
Use clean fuel. Always use clean, high-quality fuel to reduce the risk of fuel line contamination.
Regular maintenance. As part of your mower’s routine maintenance, inspect the fuel line for kinks, damage, or signs of blockage. Replace it if needed.
Proper storage. When storing your mower for an extended period, use a fuel stabilizer.
9. Clogged or Dirty Carburetor
A clogged or dirty carburetor is like a clogged artery in your mower’s engine. It’s responsible for mixing air and fuel in the right proportions for combustion.
When it’s blocked or dirty, it can’t deliver the right fuel-air mixture. This causes your mower to struggle to start, run unevenly, or not start at all.
Causes of a clogged or dirty carburetor
Stale fuel. Old or stale gasoline can leave behind deposits in the carburetor, clogging its tiny passages.
Contaminated fuel. Dirt, rust, or debris in the fuel system can find their way into the carburetor, causing blockages.
Lack of fuel stabilizer. Failure to use a fuel stabilizer when storing the mower for extended periods can result in varnish buildup within the carburetor.
Inadequate air filtration. A clogged or dirty air filter can allow dust and debris to enter the carburetor, leading to blockages.
How to prevent this
Use clean fuel. Always use fresh, high-quality fuel.
Regular air filter maintenance. Replace or clean the air filter as recommended by your mower’s manual.
Routine carburetor inspection. Periodically inspect and clean the carburetor as part of your mower’s maintenance routine. Replace it if cleaning doesn’t resolve the issue.
10. Bad Battery, Loose Cables, or Corroded Terminals
Your mower’s electrical system plays a crucial role in starting the engine. A bad battery, loose cables, or corroded terminals can disrupt this system.
This results in a no-start or sluggish starting situation. A bad battery, loose cables, or corroded terminals can affect a lawn mower’s starting process in several ways.
These include
Insufficient electrical power. A bad battery may not provide sufficient electrical power to engage the starter motor. When the battery lacks the required voltage, the starter motor won’t turn the engine over.
Poor electrical connection. Loose or damaged battery cables can disrupt the flow of electrical current. This poor connection can lead to unreliable or no electrical power reaching the engine.
Corrosion and resistance. Corroded battery terminals and cables introduce resistance in the electrical circuit. This resistance can diminish the electrical current flowing to the starter motor.
Voltage drops. When attempting to start the mower, a significant voltage drop can occur due to a bad battery or poor connections. This voltage drop can prevent the ignition system and fuel pump from functioning correctly.
The causes of bad batteries, loose cables, and corroded terminals
Battery age. Over time, a lawn mower battery degrades and loses its ability to hold a charge.
Loose or damaged battery cables. Vibrations from mowing or accidental bumps can cause battery cables to become loose or damaged.
Corrosion. Corrosion can accumulate on the battery terminals and cable connections, impeding electrical flow.
Prevention measures
Regular battery maintenance. Inspect and maintain the battery as per your mower’s manual, including cleaning terminals and ensuring proper connections.
Battery replacement. Replace the battery if it’s old, weak, or no longer holds a charge.
Secure cables. Regularly check and tighten battery cables to ensure they are securely connected.
Corrosion prevention. Apply battery terminal grease or a corrosion inhibitor to the terminals to prevent corrosion buildup.
11. Bad Safety Switch
The safety switch in a lawn mower is a critical component designed to prevent the engine from starting or running when certain safety conditions aren’t met.
If the fuel shut-off valve goes bad, it can disrupt the starting process in the following ways:
- No cranking. The safety switches may prevent the mower’s starter motor from engaging, resulting in a no-crank situation.
- Stalling. In some cases, a malfunctioning safety switch can cause the engine to stall shortly after starting or while mowing due to intermittent safety engagement.
Causes of a bad safety switch
Wear and tear. Over time, the safety switch can wear out due to repeated use and exposure to the elements.
Accidental damage. Physical damage or mishandling can cause the safety switch to malfunction.
Prevention measures
Regular inspection. Include the safety switch in your routine mower maintenance checklist. Inspect it for wear, damage, or loose connections.
Immediate repairs. If you notice any issues with the safety switch, such as intermittent operation or visible damage, address them by repairing or replacing the switch as needed.

12. Bad Ignition Switch
The ignition switch is a key player in the starting process of a lawn mower. When it goes bad, it can impact starting in the following ways:
- No electrical power. A malfunctioning ignition switch may not provide electrical power to components like the starter motor, ignition system, or fuel pump.
- Intermittent operation. A bad ignition switch can result in intermittent or unreliable electrical connections. This makes the lawn mower engine stall during operation.
Causes of a bad ignition switch
Wear and tear. Like many electrical components, the ignition switch can deteriorate over time due to repeated use.
Accidental damage. Physical damage to the ignition switch, such as from mishandling or exposure to moisture, can lead to malfunction.
Prevention tips
Regular inspection. Include the ignition switch in your routine mower maintenance. Inspect it for signs of wear, damage, or loose connections.
Immediate repairs. If you notice any issues with the ignition switch, address them by repairing or replacing the switch as needed.
13. Bad Starter Recoil
A bad starter recoil hinders the process of cranking the engine. This makes it difficult or impossible to start the lawn mower reliably.
It affects a lawn mower in the following ways:
Inability to start. When the starter recoil is faulty, it may not engage with the engine’s crankshaft or generate enough pulling force. As a result, the engine may not turn over at all.
Intermittent starting. A malfunctioning starter recoil can lead to erratic or intermittent pulling action. Sometimes, it may partially engage, causing the engine to start inconsistently or stall during the starting process.
Weak pull. In some cases, a bad starter recoil may still allow the engine to turn over, but with significantly reduced pulling force.
Causes of a bad starter recoil
Wear and tear. Like any mechanical component, the starter recoil assembly can deteriorate over time due to repeated use.
Spring damage. The recoil starter relies on a coiled spring mechanism. Damage to this spring, such as breakage or loss of tension, can result in a bad starter recoil.
Debris and contaminants. Foreign objects or debris that find their way into the recoil assembly can hinder its operation.
Prevention measures
- Regular Inspection
- Spring Maintenance
- Cleanliness
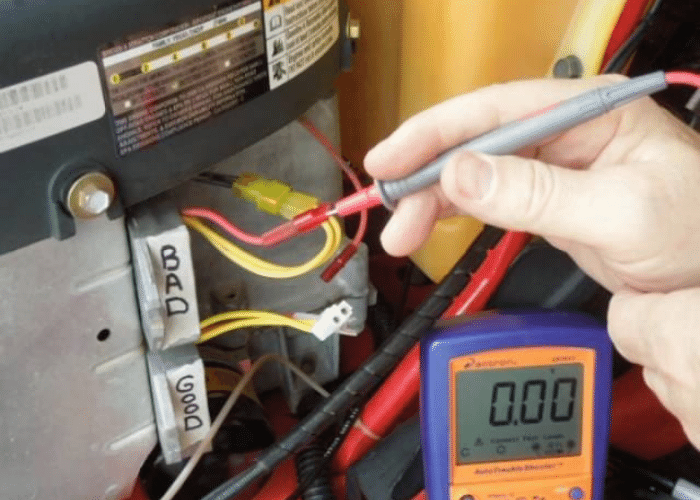
14. Bad Ignition Coil
A bad ignition coil in a lawn mower can have a significant impact on the starting process. Here’s how:
- Weak or no spark. When the ignition coil is faulty, it may produce a weak or no spark at all. This is because the ignition coil generates the high voltage needed to ignite the air-fuel mixture. Without a strong spark, the engine’s combustion process becomes inefficient.
- Intermittent spark. In some cases, a malfunctioning ignition coil can produce intermittent sparks. This inconsistency in spark production can result in the engine not starting.
- Complete ignition failure. If the ignition coil fails completely, it may not produce any spark. This renders the engine unable to start.
Causes of a bad ignition coil
Heat and age. The high temperatures and electrical stress during operation, make them worn out over time.
Moisture and contaminants. Exposure to moisture, dirt, or other contaminants damages the ignition coil’s insulation.
Voltage spikes. Electrical issues, such as voltage spikes or irregular voltage supply, can damage the ignition coil.
Prevention tips
- Regular Inspection
- Voltage regulation
- Protect from moisture
15. Faulty Charging System
A faulty charging system in a lawn mower can have several adverse effects on its operation:
Battery drain. A malfunctioning charging system may not recharge the mower’s battery while it’s running. This can lead to a gradual depletion of the battery’s charge.
No electrical power. As the battery drains, the mower’s electrical components, including the ignition system and starter motor, may not receive enough power to function correctly.
Stalling and running issues. A weak or unreliable electrical supply from the charging system can cause the engine to stall during operation.
Causes of a faulty charging system
Battery age. The mower’s battery can degrade over time, affecting its ability to hold and receive a charge.
Charging system components. Components like the alternator, voltage regulator, or charging circuit can wear out or fail due to heat, age, or electrical issues.
Quick fixes
- Inspect and test
- Replace faulty components.
Prevention tips
- Regular battery maintenance
- Routine charging system inspection
- Avoid overloading electrical accessories
16. Incorrect Starting and Operating Procedure
Incorrectly starting and operating a lawn mower can have several adverse consequences, including failure to start.
If you don’t follow the correct starting procedure, you may struggle to start the mower or even fail to start it altogether.
Common causes of incorrect starting and operating procedures
Lack of knowledge. An inexperienced user may not be familiar with the correct starting and operating procedures.
Neglecting the user manual. Some users may fail to read or follow the instructions provided in the mower’s user manual.
What are the solutions?
- Reading the user manual
- Training
- Follow safety guidelines
Prevention measures
Regular maintenance. Perform routine maintenance as recommended in the user manual.
Follow the starting steps. Pay attention to the specific starting procedure outlined in the user manual.
Warm up the engine. Allow the engine to warm up for a few minutes before engaging in heavy mowing.
17. Broken rewind spring
A broken rewind spring in your lawn mower’s starter assembly can make your lawn mower not start. The most immediate effect is the inability to use the recoil starter.
Without the recoil action, starting the mower becomes challenging. You may need to resort to alternative starting methods, which can be inconvenient.
Causes of a broken rewind spring
Wear and tear. Over time, the rewind spring can experience wear due to the repeated tension and release during starting.
Excessive force. Pulling the starter cord forcefully or abruptly can put excessive strain on the rewind spring, causing it to break.
Fixes
Replacing the rewind spring: To address a broken rewind spring, you’ll need to replace it with a new one. Ensure you get a compatible spring for your mower’s model.
Prevention tips
Gentle starter cord pull. When starting your mower, pull the starter cord gently and smoothly. Avoid yanking it abruptly, as this can reduce stress on the rewind spring.
Regular inspection. Include the starter assembly and rewind spring in your routine mower maintenance checklist. Inspect it for signs of wear and tear, and replace it if you notice any issues.
18. Frozen engine
A frozen engine is caused by extremely cold temperatures. This can result in several adverse effects on your lawn mower.
Frozen engines can lead to the inability to start, poor performance of the mower, and even engine damage.
Common causes of a frozen engine
Extreme cold. Low temperatures, especially below freezing, can cause the engine’s lubricants to thicken or freeze.
Solutions
Thawing the engine. If your engine is frozen, move the mower to a warmer area, such as a garage, and allow it to thaw naturally.
Do not force start. Never attempt to force-start a frozen engine by pulling the starter cord aggressively.
Prevention tips
Winterize the mower. Properly prepare your mower for storage before winter. This includes draining or stabilizing the fuel, changing the oil, and storing the mower in a dry, sheltered location.
Use cold-weather oil. In areas of cold winters, use a cold-weather oil that remains more fluid at low temperatures.
19. Broken or disconnected wires
Broken or disconnected wires within your lawn mower’s electrical system can lead to a range of issues that affect its starting.
When there’s a broken wire in the lawn mower, there will be o electrical power that will affect the normal operation.
Common causes of broken or disconnected wires
Vibration and wear. The constant vibration and movement of a lawn mower causes wires to rub against components or wear out over time.
Accidental damage. Mishandling, accidental pulls, or impacts can damage or disconnect wires.
Solutions
Visual inspection. Inspect the wiring harness and connections for any visible signs of damage, wear, or disconnection.
Wire repair or replacement. If you identify damaged wires, repair or replace them with compatible wiring and connectors.
Prevention tips
- Regular inspection
- Secure wiring
- Handle with care
Murray Lawn Mowers Troubleshooting
| Issue | Possible solutions |
| Engine Won’t Start | 1. Check fuel level and add fresh gasoline if needed. 2. Ensure the spark plug is clean and properly gapped. 3. Inspect the air filter for dirt or damage. 4. Verify the safety features like the kill switch. 5. Check for a clogged fuel filter or fuel line. 6. Clean the carburetor or replace if necessary. |
| Engine Stalls or Runs Roughly | 1. Check fuel level and add fresh gasoline if needed. 2. Ensure the spark plug is clean and properly gapped. 3. Inspect the air filter for dirt or damage. 4. Verify the safety features like the kill switch. 5. Check for a clogged fuel filter or fuel line. 6. Clean the carburetor or replace it if necessary. |
| Excessive Vibration | 1. Inspect the blade for damage or imbalance. 2. Tighten loose bolts, especially on the blade. 3. Check for bent or damaged crankshaft or blade. |
| Poor Cutting Performance | 1. Sharpen or replace the mower blade. 2. Adjust the mower deck to the proper height. 3. Ensure the grass is dry when mowing. 4. Check for clogs in the discharge chute or bag. |
| Smoke or Excessive Exhaust | 1. Check the oil level and add oil if necessary. 2. Inspect for oil leaks and fix any issues. 3. Clean or replace the air filter if it’s dirty. 4. Adjust the carburetor’s fuel mixture settings. |
| Uneven Cutting | 1. Check the tire pressure and adjust as needed. 2. Inspect the blade for damage or wear. 3. Level the cutting deck if it’s uneven. |
| Self-Propel Doesn’t Work | 1. Check the drive belt for damage or looseness. 2. Inspect the drive cable for kinks or damage. 3. Adjust the drive control if necessary. 4. Lubricate the self-propel mechanism if it’s stiff. |
When to Seek Professional Help
While many common lawn mower issues can be resolved with DIY troubleshooting and maintenance, there are certain situations where you need to seek professional help.
Here are some instances:
- Safety concerns
- Complex engine repairs
- Electrical issues
- Warranty coverage
- Lack of experience
- Specialized tools
- Time constraints
- Persistent problems
- Fuel or oil leaks
- Warranty servicing
Preventive Maintenance Tips
Preventive maintenance is crucial to keep your lawn mower in top shape. Here are some essential tips:
- Check the mower for loose bolts, damaged parts, and oil or fuel leaks.
- Clean or replace the air filter as needed to ensure proper airflow.
- Use fresh fuel with the right octane rating and add a fuel stabilizer for storage.
- Change the oil according to the manufacturer’s recommendations.
- Inspect and replace the spark plug as necessary.
- Keep the mower blade sharp for efficient cutting.
- Lubricate moving parts such as wheels and cables.
- For electric mowers, check and charge the battery regularly.
- Store your mower in a dry, sheltered area to prevent rust and damage.
- Always follow the manufacturer’s maintenance guidelines in the owner’s manual.
FAQs
How do you clean a carburetor on a Murray riding mower?
Accessing the carburetor
Removing the air filters
Disconnecting the fuel lines
Removing the carburetor
Cleaning the carburetor using a spray carburetor cleaner or a mixture of water and vinegar
Inspect gaskets and O-rings for damage
Reassembling the carburetor
Reinstalling the air filter
Refueling the tank
Why won’t my lawn mower start after not being used?
Conclusion
A Murray mower that won’t start can be a real headache. But remember, even the sturdiest machines need a little TLC.
It’s a universal frustration, that moment when your trusted mower just won’t cooperate. But we’ve all been there, facing the pull cord with determination.
Luckily, with a dash of patience and some know-how, you can conquer them. So, gear up, troubleshoot, and let your Murray riding lawn mower roar back to life.