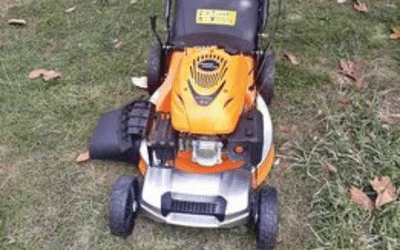
Your yard is overgrown, and you’re all set to unleash your inner lawn guru but your Honda lawn mower won’t start.
If you’ve ever found yourself in this baffling and frustrating situation, you’re not alone. Lawn mowers, like all mechanical beings, have their quirks and temperamental tendencies.
Sometimes, it feels like they’ve formed an alliance with your lawn, conspiring to keep you from that well-manicured oasis you dream of.
But fear not. I am here to decode the mysteries behind those stubborn engines that just won’t purr to life.
Why Honda Lawn Mower Won’t Start?
Let’s dive deep into the 18 reasons why your Honda lawn mower might throw a tantrum and refuse to start.
From the “I forgot to refill the gas” moments to the “Why is the blade engagement lever laughing at me?” situations, I’ve got you covered.
1. No Gas in the Fuel Tank
A common reason your Honda lawn mower won’t start is the absence of gas in the fuel tank. While this might seem obvious, overlooking this simple issue can lead to unnecessary frustration.
A steady supply of clean, fresh fuel is essential for the engine to ignite and run smoothly.
But worry not. I will help you understand the causes and solutions related to this problem.
Possible causes
If your gas tank is empty, there’s obviously no fuel to power the engine. This might happen if you forgot to refill the tank after your last mowing session.
Solutions
Check the fuel level. Before attempting any other troubleshooting steps, ensure that the fuel tank has an adequate amount of gasoline. If the gas tank is indeed empty, this is likely the root cause of the issue.
Refill with fresh gas. If you find the fuel tank empty, refill it with fresh, clean gasoline. Make sure you’re using the appropriate fuel type. Use unleaded gasoline with an octane rating of 87 or higher.
Fuel stabilizer. If you anticipate long periods of inactivity for your lawn mower, use a fuel stabilizer before storing it. This helps prevent fuel deterioration and clogging in the fuel system.
Prevention tips:
Regular refueling. Develop a habit of checking the fuel level before each mowing session and refilling the tank as needed. This prevents unexpected interruptions during your yard work.
Proper storage. If you’re storing your lawn mower for an extended period, either use up the remaining fuel or drain the tank to prevent fuel-related issues.

2. Fuel Valve is in the Off Position
Imagine this scenario: you’re all set to mow your lawn, but your Honda lawnmower refuses to start. One potential reason for this frustration might be the fuel valve being in the off position.
While it might seem like a simple oversight, this issue can disrupt your mowing plans. Let’s delve into the possible causes, solutions, and prevention tips to ensure your lawn mower is always ready to go.
Possible causes:
Accidental turn-off. Sometimes, in the process of moving or storing the lawn mower, the fuel valve might be turned off.
What to do:
Locate the fuel valve. The fuel valve is usually located on the side or bottom of the fuel tank. It typically has two positions: “On” and “Off.”
Switch to the “on” position. If you find that the fuel valve is indeed in the off position, gently turn it to the “On” position. This allows fuel to flow to the engine.
3. Bad or Old Fuel
A Honda lawn mower’s inability to start due to bad or old fuel might seem surprising, but it’s common mostly among Honda Pioneer 700 problems.
Stale fuel can lead to clogged carburetors, gummed-up fuel lines, and inefficient combustion. All hinder engine performance.
By using fresh fuel and fuel stabilizers, you can ensure that your lawn mower’s engine remains in optimal condition.
Remember, a little attention to your fuel can ensure a smooth and reliable start every time you’re ready to tackle your lawn.
Possible causes:
Stale fuel. Fuel tends to degrade over time, especially if it’s been sitting in the tank for an extended period without use.
Ethanol content. Modern gasoline often contains ethanol. This can absorb moisture and lead to fuel separation and degradation.
Solutions:
Drain old fuel. If you suspect bad or old fuel, drain the old gasoline from the fuel tank and carburetor.
Refill with fresh fuel. Replace the old fuel with fresh, clean gasoline that meets the manufacturer’s specifications. Use the right fuel type (regular unleaded gasoline) and adhere to the recommended fuel-to-oil ratio.
Fuel stabilizer. To prevent fuel deterioration during periods of inactivity, add a fuel stabilizer to your gasoline before storing your lawn mower. This helps maintain the fuel’s quality and prevents clogs.
Prevention tips:
Regular use. If possible, run your lawn mower throughout the year, even during the off-season. This prevents fuel from sitting in the tank for extended periods.
Purchase fresh fuel. When refilling your fuel, you can opt for gasoline from a high-traffic station. With this, you are sure of getting fresh fuel with less chance of contamination.
Use fuel additives. Use fuel additives designed to stabilize the fuel and minimize the negative effects of ethanol. Read the labels and follow the manufacturer’s recommendations.
4. Bad Mower Fuel Cap
In the grand symphony of lawn mower maintenance, the fuel cap might play a subtle role, but its impact is undeniable.
A bad fuel cap can lead to pressure imbalances, vapor lock, and fuel contamination. All these can leave you with an uncooperative mower.
By understanding the potential causes, maintaining your fuel cap, and following prevention tips, you can ensure that your Honda lawnmower starts up well and performs at its best whenever your lawn demands attention.
Possible causes:
Ventilation issues. Many modern fuel caps are designed with ventilation systems to regulate air pressure within the fuel tank. If the vent is clogged or malfunctioning, it can disrupt this pressure balance.
Sealing problems. A fuel cap that doesn’t seal tightly can allow air to enter the fuel tank, leading to evaporation and potential contamination.
Quick fixes:
Ventilation check. Regularly inspect the ventilation system on your fuel cap. If you find it clogged, clean it thoroughly to restore proper airflow. If the problem persists, consider replacing the cap.
Sealing inspection. Examine the seal on your fuel cap for cracks, wear, or damage. If the seal is compromised, replace the fuel cap with a new, genuine Honda part to ensure a proper fit.
Prevention tips:
Visual checks. Incorporate a quick visual inspection of your fuel cap into your regular lawn mower maintenance routine. Look for any signs of wear, cracks, or damage.
Tighten securely. After each use, make sure to securely tighten the fuel cap. This prevents debris, water, and contaminants from entering the fuel tank.
Proper storage. When storing your Honda lawn mower, ensure the fuel cap is securely closed. This prevents moisture and foreign particles from infiltrating the fuel.
5. Incorrect Starting Procedure and Operation
Starting your Honda lawnmower isn’t merely a matter of pulling a cord or turning a key. It’s a carefully orchestrated sequence that ensures the engine springs to life with vigor.
Each component of this procedure, from the ignition key to the throttle and choke settings, plays a pivotal role in the engine’s responsiveness.
Just like an orchestra that requires each instrument to be in tune, your lawn mower demands precise execution to perform its best.
Possible causes:
The ignition key is not turned on. If your mower has a key ignition, not turning the key to the “On” position can lead to a silent engine.
The throttle is not engaged. If your mower has a throttle control, not engaging it to the appropriate position before starting can hinder the engine’s ignition.
The choke is not set properly. Incorrectly setting the choke, especially in colder weather, can make it difficult for the engine to start.
Quick fixes:
Ignition key check. Ensure that the ignition key is turned to the “On” position before attempting to start the mower.
Throttle adjustment. If your mower features a throttle control, make sure it’s set to an appropriate position based on the starting recommendations in your manual.
Choke position. In colder conditions, set the choke to the “Choke” position before attempting to start the mower. Once the engine warms up, move the choke to the “Run” position.
Prevention tips:
Read the manual. Familiarize yourself with your Honda lawn mower’s specific starting procedure as outlined in the manual. Each model might have different requirements.
Warm-up routine. Especially in colder weather, allow your mower a few minutes to warm up before engaging the blades or beginning your mowing session. This prevents engine strain.
Routine maintenance. Inspect and maintain your mower’s key components, including the ignition system, throttle, and choke mechanisms, to ensure they’re functioning well.
6. Clogged Fuel Filter
The fuel filter is not just a mere cog in the machine. It’s the gatekeeper between your mower’s engine and the fuel tank.
Its primary function is to sieve out dirt, debris, and impurities from the fuel. This ensures that only clean and uncontaminated fuel enters the engine.
This seemingly small task has a massive impact on the engine’s performance and longevity.
The causes:
Dirt and particles. Over time, dust, dirt, and tiny particles can accumulate in your fuel tank. These impurities can find their way into the fuel filter, slowly clogging it up.
Old fuel. Fuel that has been sitting in the tank for extended periods can break down, creating sediments that can clog the filter.
How to fix the problem:
Replacement. Regularly inspect your fuel filter and replace it according to your mower’s maintenance schedule.
Cleaning. In some cases, you might be able to clean the filter to restore its function, but replacement is often the most effective solution.
Prevention:
Regular maintenance. Routine checks and replacements of the fuel filter are crucial. Consult your mower’s manual for the recommended maintenance intervals.
Clean fuel. Use clean, fresh fuel that adheres to the manufacturer’s guidelines to minimize the accumulation of impurities in the fuel tank.
7. Clogged Fuel Line
The fuel line isn’t just a passive conduit. It’s the lifeline that connects the fuel tank to your engine.
Its primary task is to transport fuel from the tank to the engine, ensuring a steady fuel flow of the lifeblood your mower needs to roar to life.
A clogged fuel line can disrupt this flow, leading to a range of frustrating symptoms.
The causes:
Fuel degradation. Over time, fuel can degrade and form varnish or deposits that can cling to the inner walls of the fuel line, narrowing its diameter.
Dirt and debris. If your fuel tank isn’t kept clean or if you use contaminated fuel, dirt, rust, and debris can find their way into the fuel line, obstructing the flow.
The solution:
Replacement. In severe cases, replacing the clogged fuel line might be necessary. Consult your mower’s manual or seek professional assistance for this task.
Cleaning. In some situations, you might be able to clean the fuel line using appropriate cleaning solutions or methods. However, replacement is often the most effective solution.
Prevention:
Fuel quality. Use clean, fresh fuel that adheres to the manufacturer’s recommendations to minimize the risk of fuel line clogs.
Regular inspection. Include a routine check of your fuel line in your maintenance schedule. Look for signs of degradation, cracks, or clogs.
8. Bad Carburetor
The carburetor serves as the conductor of the engine’s fuel symphony. Its primary function involves blending fuel and air in precise ratios before supplying them to the engine for combustion.
When a carburetor goes awry, it upsets this intricate harmony, triggering a chain reaction of performance issues.
Causes:
Fuel residue. Over time, fuel can leave behind deposits or residue that clog the small passages and jets within the carburetor.
Airflow blockage. Dirt, dust, and debris can find their way into the carburetor, obstructing the essential airflow needed for fuel mixing.
Deterioration. The internal components of the carburetor can degrade over time due to wear and tear, resulting in malfunction.
The Solution:
Cleaning and repair. In mild cases, cleaning the carburetor and making necessary repairs might restore its function. Spray carburetor cleaner to remove built-up deposits and debris that can obstruct fuel flow and disrupt the air filter cover.
Replacement. In severe cases, a bad carburetor might need replacement. Replacing this component with a genuine Honda part ensures optimal performance.
Prevention:
Regular maintenance. Include carburetor maintenance in your routine mower upkeep. Consult your manual for cleaning and inspection guidelines.
Fuel quality. Use clean, fresh fuel to reduce the likelihood of carburetor clogs.
Related read: Where is the carburetor on a lawn mower located?
9. Plugged Air Filter
The air filter is the guardian that stands between your engine and the outside world. Its function is to trap dust, dirt, and debris from the air before it enters the engine’s combustion chamber.
This small element wields immense power over your mower’s performance. Understanding its significance is key to maintaining a thriving mowing experience.
Causes:
Dust and particles. Over time, the air filter housing accumulates dust, dirt, and small particles from the environment. This buildup can clog the filter, restricting airflow.
Neglect and infrequent cleaning. If the air filter isn’t cleaned or replaced, its efficiency diminishes, leading to blockage.
Possible fixes:
Cleaning. In mild cases, removing and cleaning the air filter can restore its function. Consult your mower’s manual for cleaning guidelines.
Replacement. If the air filter is severely clogged or damaged, replacing it with a new, genuine Honda part is the most effective solution.
Prevention:
Regular inspection. Include the air filter in your regular maintenance checks. Clean or replace it as recommended by your mower’s manual.
Clean environment. Store your Honda lawnmower in a clean, dry environment to minimize the accumulation of dirt and debris on the air filter.
10. Bad or Improperly Gapped Spark Plug
Though a tiny part, the spark plug is the conductor of ignition magic. It generates the spark necessary to ignite the air-fuel mixture in the engine’s combustion chamber.
This tiny component holds the power to kickstart your mower’s engine into action.
The causes:
Wear and tear. Over time, the spark plug’s electrodes can wear down, leading to a weaker spark and poor combustion.
Neglected maintenance. If spark plugs are not regularly cleaned or replaced as needed, their performance deteriorates.
Improper gap. The distance between the spark plug’s electrodes, known as the “gap,” needs to be within the manufacturer’s specifications. An incorrect gap can hinder proper ignition.
Quick fix:
Replacement. In cases of a worn-out spark plug or improper gap, replacement is the most effective solution. Consult your mower’s manual for the correct spark plug specifications.
Proper gapping. If replacing the spark plug, ensure the gap between the electrodes is set according to the manufacturer’s recommendations.
Prevention:
Regular inspection. Include the spark plug in your routine maintenance checks. Clean, replace, or adjust the gap as necessary.
Quality spark plugs. Opt for high-quality spark plugs that are compatible with your Honda lawn mower’s specifications.
11. Bad Ignition Coil
The ignition coil isn’t a simple component. It serves as the conductor of electrical enchantment.
Its main role is to convert the low voltage supplied by your mower’s battery into a high-voltage spark. It then ignites the air-fuel mixture within the engine’s combustion chamber.
Despite its unassuming size, this component wields immense influence over the ignition process of your mower.
Possible causes:
Wear and tear. Over time, the ignition coil’s internal components can degrade due to the repetitive electrical cycles they endure.
Heat and age. Exposure to heat and the natural wear of age can lead to insulation breakdown within the coil.
Electrical stress. Factors like voltage fluctuations, poor connections, or excessive moisture can stress the ignition coil, affecting its performance.
Easy fix:
Replacement. In cases of a worn-out or faulty ignition coil, replacement is the recommended solution. Refer to your mower’s manual for the correct coil specifications.
Professional assistance. Diagnosing and replacing an ignition coil might require specialized tools and expertise. Consider seeking professional help.
Prevention:
Regular inspection. Include the ignition coil in your regular maintenance routine. Look for signs of wear, corrosion, or damage.
Quality components. Opt for genuine Honda ignition coils or reputable aftermarket options.
12. Bad Recoil
The recoil, or starter cord assembly, is far from a mere accessory. It’s the commander of your mower’s starting process.
Its primary function involves storing and releasing the tension needed to turn the engine over when you pull the starter cord.
This action sets the engine into motion and initiates the ignition process. A well-functioning recoil ensures that your mower springs to life with each confident pull of the starter cord.
Causes:
Mechanical wear. Over time, the mechanical components of the recoil can experience wear and tear due to repeated use.
Tension loss. The recoil relies on proper tension to function effectively. Over time, the tension can diminish, affecting its ability to engage the engine.
Neglected maintenance. If the recoil assembly isn’t regularly inspected, cleaned, and lubricated, its performance can suffer.
Solution:
Recoil inspection. Regularly inspect the recoil assembly for signs of wear, fraying, or damage. Lubricate moving parts as recommended in your mower’s manual.
Replacement. If the recoil is damaged or non-functional, replace it with a genuine Honda part.
Prevention:
Routine maintenance. Include the recoil in your regular maintenance routine. Keep it clean, lubricated, and properly tensioned.
Gentle handling. Pull the starter cord firmly and evenly to avoid putting undue stress on the recoil assembly.
13. Bad Battery or Blown Fuse (Electric Start)
A bad battery or blown fuse might appear insignificant. However, their impact on your Honda lawn mower’s electric start system is monumental.
By recognizing their roles as power providers and protectors, understanding the causes and consequences of their malfunction, and prioritizing regular maintenance, you can ensure that your mowing endeavors remain efficient, reliable, and hassle-free.
After all, a well-powered electric start system is the spark that ignites your engine and propels you toward a well-groomed yard.
Causes:
Bad battery. Over time, batteries can lose their charge-holding capacity or suffer from internal degradation. A weak or dead battery can prevent the electric start system from functioning.
Blown fuse. Fuses act as protective barriers, preventing excessive electrical currents from damaging the system. A blown fuse, often due to electrical surges, can disrupt the flow of power to the electric start mechanism.
Solution:
Battery inspection. Regularly assess your battery’s charge level. If it’s consistently weak or not holding a charge, replacement might be necessary.
Fuse check. Inspect the fuse for signs of damage or burnout. If you identify a blown fuse, replace it with the correct rating as specified in your mower’s manual.
Prevention:
Battery maintenance. Keep your battery charged regularly, especially during the off-season. Store it in a cool, dry place to prolong its lifespan.
Fuse awareness. Understand the correct fuse ratings for your mower and avoid overloading the electrical system.

14. Bad Ignition Switch (Electric Start)
The ignition switch isn’t just a small part. It serves as the orchestrator of your electric start system’s performance.
Its controls the flow of electrical power from the battery to various components, including the starter motor.
When you turn the key or press the button, the ignition switch initiates a sequence that sets your mower’s engine into motion.
Causes:
Mechanical wear. Over time, the ignition switch’s mechanical components can experience wear due to frequent use.
Corrosion. Moisture and environmental factors can lead to corrosion on the electrical contacts of the ignition switch.
Internal faults. The internal circuits of the ignition switch can develop faults or breaks, preventing proper electrical connection.
What to do:
Switch inspection. Regularly check the ignition switch for signs of wear, corrosion, or damage. Clean the contacts and lubricate moving parts as needed.
Replacement. If the ignition switch is significantly damaged or non-functional, replacing it with a genuine Honda part is recommended.
Prevention:
Regular maintenance. Include the ignition switch in your routine mower upkeep. Keep it clean, dry, and well-lubricated.
Quality components. Opt for genuine Honda ignition switches or reputable aftermarket options that match your mower’s specifications.
15. Bad Starter Solenoid (Electric Start)
The starter solenoid isn’t an ordinary element. It’s the conductor of ignition energy. It completes the electrical circuit between the battery and the starter motor.
When you activate the electric start button, the solenoid receives an electrical signal and engages the starter motor, setting your mower’s engine into motion.
The Causes:
Mechanical wear. Repeated engagement can lead to mechanical wear in the starter solenoid’s internal components.
Electrical stress. Voltage fluctuations or surges can stress the solenoid’s electrical components, affecting its performance.
Corrosion. Moisture and environmental factors can cause corrosion on the solenoid’s contacts, impeding the flow of electricity.
Solutions:
Solenoid inspection. Regularly inspect the starter solenoid for signs of wear, corrosion, or damage. Clean contacts and ensure secure connections.
Replacement. If the starter solenoid is damaged or fails to function, replacing it with a genuine Honda part is advisable.
Prevention:
Routine maintenance: Include the starter solenoid in your regular mower maintenance routine. Keep it clean, dry, and well-connected.
Quality parts. Opt for genuine Honda starter solenoids or reputable aftermarket options that match your mower’s specifications.
16. Low Compression
Low compression isn’t just a mechanical term. It’s the whispered language of your engine’s vitality.
In simple terms, compression refers to the pressure built within the engine’s cylinders during the compression stroke.
Low compression means this pressure isn’t reaching the necessary level for optimal engine function.
Causes:
Aging components. Over time, the engine’s internal components, such as piston rings and valves, can wear down or lose their sealing ability.
Worn pistons and rings. Damaged or worn piston rings can allow air to leak out of the cylinders, reducing compression.
Valve problems. Malfunctioning valves, whether they fail to close or become damaged, can impact compression.
What to do:
Professional diagnosis. Diagnosing and addressing low compression often require specialized tools and expertise. Consult a professional if you suspect this issue.
Engine overhaul. In severe cases, an engine overhaul might be necessary, involving the replacement of worn components to restore compression.
Prevention:
Regular maintenance. Adhere to your mower’s maintenance schedule, which includes routine checks of the engine’s compression levels.
Quality fuel. Use clean, high-quality fuel and adhere to manufacturer recommendations to prevent carbon buildup that can affect compression.
17. Flywheel Timing
Flywheel timing and the shear key aren’t just mechanical jargon. They embody the precision that drives your engine’s rhythm.
The flywheel’s positioning in relation to the crankshaft is crucial for proper engine timing, facilitated by the shear key—a small connecting piece that prevents the flywheel from shifting.
This alignment ensures optimal ignition and power generation.
Causes:
Shear-key wear. Over time, the shear key can wear down due to the repeated stresses of engine operation, leading to misalignment.
Flywheel misalignment. Incorrect assembly or mechanical damage can disrupt the flywheel’s alignment, affecting engine timing.
Stress and strain. Severe impacts or external stress on the flywheel can damage the shear-key and result in misalignment.
Solution:
Professional inspection. Diagnosing and addressing flywheel timing and shear-key issues often require specialized knowledge. Consult a professional if you suspect these problems.
Shear-key replacement. If the shear-key is worn or damaged, replacing it with the correct part is essential for proper alignment.
18. Sticking Valve (The Fluid Dance)
A sticking valve is a disruption in the fluid dance of your engine’s cycles. Valves play a pivotal role in regulating airflow and fuel intake.
When a valve sticks—either due to dirt, carbon buildup, or mechanical problems—the engine’s performance suffers.
Causes:
Carbon deposits. Carbon buildup on valve stems and guides can cause valves to stick in the closed position, affecting airflow.
Mechanical wear. Over time, valve components can wear, leading to misalignment and sticking.
Lubrication problems. Insufficient lubrication or improper oil quality can contribute to valve sticking.
What to do:
Professional attention. Addressing sticking valve issues often requires specialized expertise. Seek professional assistance for diagnosis and repair.
Cleaning and lubrication. In mild cases, cleaning valve components and ensuring proper lubrication can restore proper function.
Prevention:
Regular maintenance. Follow your mower’s maintenance schedule, which includes checking and cleaning valves and lubricating moving parts.
Quality fuel and oil. Use clean, high-quality fuel and adhere to manufacturer recommendations for engine oil to minimize carbon buildup.
Own a Toro mower with starting issues? Read our Toro lawn mower won’t start article.
Table: Honda Mower Won’t Start
| Problems | Causes | Solutions |
| No gas in the fuel tank | Fuel tank is empty | The fuel tank is empty |
| Fuel valve in the off position | Accidental turn off | Locate the fuel valve Switch to the on position |
| Bad or old fuel | Stale gas | Drain old fuel Refill with fresh fuel Use fuel stabilizer |
| Bad mower fuel cap | Ventilation issues Sealing problems | Ventilation check Sealing inspection |
| Incorrect starting procedure and operation | The ignition key is not turned on Throttle not engaged The choke lever is not set properly | Ignition key check Throttle adjustment Choke position |
| Clogged fuel filter | Dirt and particles Old fuel | Replacement Cleaning |
| Clogged fuel line | Fuel degradation Dirt and debris | Replacement Cleaning |
| Bad carburetor | Fuel residue Airflow blockage | Ignition key is not turned on Throttle not engaged Choke lever not set properly |
| Plugged air filter | Dust and particles Negligence and infrequent cleaning | Cleaning Replacement |
| Bad or improperly gapped spark plug | Wear and tear Neglected maintenance Improper gap | Replacement Proper gapping |
| Bad ignition coil | Wear and tear Heat and age Electrical stress | Replacement |
| Bad recoil | Mechanical wear Tension loss Neglected maintenance | Recoil inspection Replacement |
| Bad battery or blown fuse | Bad battery Blown fuse | Battery inspection Fuse check |
| Bad ignition switch | Mechanical wear Corrosion Internal faults | Switch inspection Replacement |
| Bad starter solenoid | Solenoid inspection Replacement | Solenoid inosection Replacement |
| Low compression | Aging components Worn pistons and rings Valve problems | Professional diagnosis Engine overhaul |
| Flywheel timing | Shear key wear Flywheel misalignment Stress and strain | Professional inspection Shear-key replacement |
| Sticking valve explored | Carbon deposits Mechanical wear Lubrication problems | Professional attention Cleaning and lubrication |
Honda gcv 160 Won’t Start?
Your Honda GCV 160 engine could be refusing to start because of a few potential causes.
Check the fuel tank for fresh and uncontaminated fuel, examine the spark plug for wear, and ensure the air filter is clean. Confirm that the engine oil is at the proper level and that safety features are engaged.
Priming the engine and adjusting the choke and throttle lever might help. If these steps don’t resolve the issue, investigate the carburetor for clogs, consider compression issues, and examine the ignition system.
If troubleshooting doesn’t succeed, seek help from a Honda engine service center.
Honda gcv 170 Won’t Start?
If your Honda GCV 170 engine isn’t starting, there are several factors to take into account. Begin by ensuring there is fresh and uncontaminated fuel in the tank, and confirm that the fuel shut-off valve is open.
Assess the spark plug for indications of wear or fouling, and replace it if needed. Verify that the air filter is clean and not obstructing airflow.
Check the oil level, as insufficient oil can impede starting. Validate that safety features, like the blade control lever, are correctly engaged.
If your engine has a primer bulb, use it to assist in fuel delivery.
If these measures prove ineffective, address the carburetor and ignition system health and seek professional help.
Honda hrx 217 Won’t Start?
When faced with a non-starting Honda HRX 217 mower, explore the various potential causes. Begin by ensuring the fuel bowl holds fresh, uncontaminated fuel and verify the proper openness of the fuel valve.
Thoroughly inspect the spark plug for any signs of wear or fouling, replacing it as required. Validate the cleanliness of the air filter, confirming it doesn’t obstruct airflow.
For mowers equipped with a primer bulb, its use can assist in facilitating fuel delivery.
Honda hrr 216 Won’t Start?
When your Honda HRR 216 mower refuses to start, begin by ensuring the presence of fresh, clean fuel in the tank and verifying that the fuel valve is open.
Examine the spark plug for any signs of wear or fouling, and replace it if necessary. Confirm that the air filter is clean and allows proper airflow.
Check the oil level, as insufficient oil can hinder starting. Verify the proper engagement of safety features, such as the blade control lever. If your mower features a primer bulb, utilizing it can aid in fuel delivery.
FAQs
Why is my lawn mower suddenly not starting?
Why is my Honda push mower hard to start?
Why is my Honda riding mower not starting?
Why won’t my lawn mower start after not being used?
Conclusion
There you have it; a comprehensive guide to troubleshooting and resolving the frustrating issue of a Honda lawn mower that won’t start.
From checking the fuel quality and valve openness to inspecting the spark plug, air filter, and oil level, you’ve covered the essential bases.
Ensuring the correct engagement of safety features and utilizing the primer bulb, if applicable, are extra steps toward successful troubleshooting.
Remember, if your efforts to diagnose and address the problem don’t yield results, don’t hesitate to seek professional help.